For Christmas this year I decided to make nearly everyone in my family homemade coasters. We did it before/during the Saturday Morning Session of the October 2012 General Conference. I couldn't have completed this project without David. The resin was kind of stressful and had to be used quickly.
We first covered our table with wax paper and secured it with tape.
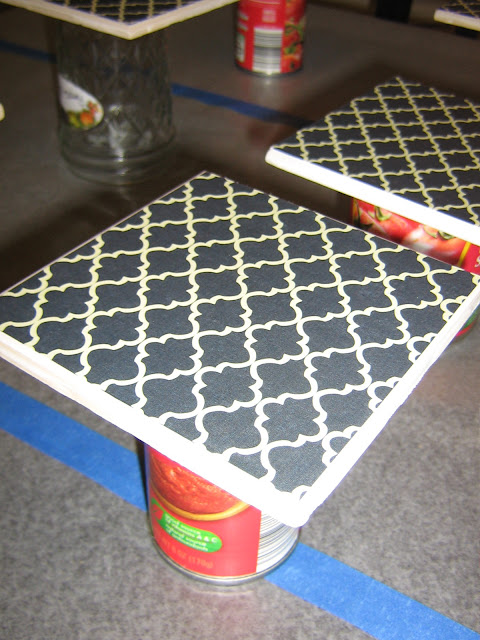
We needed some way to prop the tiles above the table so it didn't glue to the wax paper, but we soon ran out of lids and table space.
This is only about half of the tiles. As you can see, we resorted to using cans. You can thank David for his creativity.
I used scrapbook paper based on the recipients kitchen decor. We secured the paper by using your everyday school-issued glue stick. It is important to securely glue the edges and corners down, otherwise it will difficult for the resin to seal the edges and make it completely waterproof.
At first we were unsure as to how much resin to pour on, but I would err on the conservative side. The resin spreads quite well on it's own, but we used popsicle sticks to coax the resin towards the sides. If my chemistry knowledge is correct, it has the same properties of water in that both exhibit surface tension. You know when you fill a tablespoon with water and you can fill it up past the edge without it spilling over? Yeah, that's what I'm talking about.
You want to ensure that resin is up and over the edge, like the upper right corner in the picture below. There is plenty of resin on this tile; use a popsicle stick to coax it towards the sides.
Once the resin is sufficiently covering the tile, use a straw to gently blow the bubbles out. This is a very important step that can not be skipped. Each tile can take up to 7 minutes, which is why you want to work in small batches so the resin doesn't dry before you can get the bubbles out.
Note, the plastic measuring cup is how we measured and mixed the resin.
In this picture you can see tiles that contain the resin and those that do not. Resin darkens the original color a bit. After it dries it lightens up again, but not to the same shade.
There is no way this project can stay nice and neat.
Here the coasters begin it's drying phase. In humid Georgia it took 48 hours. During that time a bit of dust accumulated on tiles which was impossible to both prevent and remove. Well, I suppose if your project didn't take up the entire table it could be covered, but nevertheless you couldn't tell it had a bit of dust unless you looked at it closely and under a bright light.
I'm very glad I did this project in October, and not in November or December. Those months turned out to be extremely busy with all day babysitting, being in charge of the ward Christmas party, a performance, obligatory friend dates (which I do not AT ALL regret, it was just one more thing, if you know what I mean...), making toffee and sesame seed candy for neighbors and friends, sending Christmas cards, ect. It was a very fun end of the year, but not conducive to undertaking a large project.


6 comments:
I LOVE my coasters, Rachel! It's so fun to see all the different ones you made. Be careful. Now I just may expect something so creative every year. :)
Awesome job!!!! And it's so great to "hear" about you again. :) Hope Atlanta is treating you good
We shop at the same store! We have those chili-style diced tomatoes in our food storage.
Great project!
Hey there!! I love the coasters. I love the prints too! How does the resin work? I've only used Mod Podge when making coasters.
AWESOME! You are so creative! Give me more ideas for birthdays this year ;)
The bubbles also come out using a propane torch. Our kids caught us Christmas Eve, trying hard to not burn down the dinning room table that I had bleached, used glue as a resist to write out The Family: A Proclamation to the World, and then stained over resist so the words showed and THEN put resin on top. I tried blowing out the bubbles, but too big of a surface, so John got out the torch to try and speed it up. We ate on the floor that year. Resin is awesome, like 50 coats of polyurethane, but horrible to try and sand off if you make a mistake...Great tile coaster project! Can't wait to see what you make next!
Post a Comment